


How to Build a DIY Floating Bathroom Vanity
- Aug 6, 2023
- 3 min read
Updated: Apr 2, 2024
Are you looking to add a touch of modern elegance to your modern farmhouse bathroom? A floating bathroom vanity made out of plywood might be just the perfect solution for you! In this blog post, we will share our before and afters of our own powder room vanity and a step-by-step guide on how to build your own floating bathroom vanity using plywood.
Materials you will need:
- Plywood board (preferably ¾ inch thick)
- 2x3's
- Circular saw or table saw
- Drill and screws
- Brad Nailer
- Stud finder
- Level
- Measuring tape
- Sandpaper
- Stain or paint
- Polyurethane sealant
Step 1: Measure and plan
Start by measuring the space where you want to install the floating vanity. Consider the height, width, and depth that will work best for your bathroom. Once you have your measurements, sketch out a design and create a list of materials you need. This is the space that we were starting with:

We wanted the statement to be the floating vanity, so we measured the back wall and revolved our entire design around the vanity.
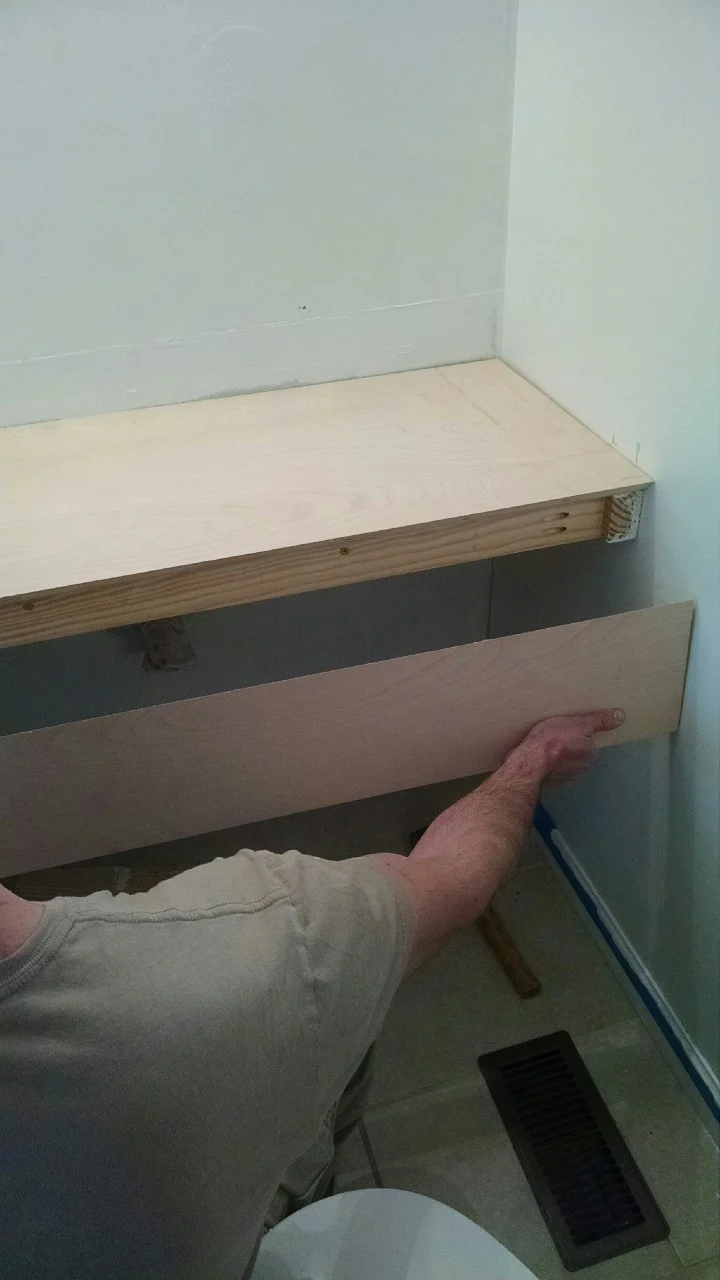
Step 2: Cut the plywood
Using a circular saw or table saw, cut the plywood board into the desired dimensions for the vanity cabinet and drawers. Make sure to wear proper safety gear while operating the saw. Smooth out any rough edges with sandpaper. We only needed to cut the top piece and the front piece, as we weren't going to put any drawers in and we wanted it to be long enough to hide the pipes under the sink. We chose not to box it in so that if there are any issues with plumbing it will be easily accessible. Due to this room being one of our first remodels, we made the HUGE mistake of trying to save money and we purchased birch plywood, not realizing that it is a nightmare to stain. Lesson learned! We will now only use oak when we're building in order to assure a beautiful stained vs patchy finish.
Step 3: Build a Frame / "Skeleton"
Using 2×3’s and 3” wood screws, build the frame / "skeleton" and anchor to studs. Make sure to level and to find the studs and anchor the frame to the studs so that it is sturdy.


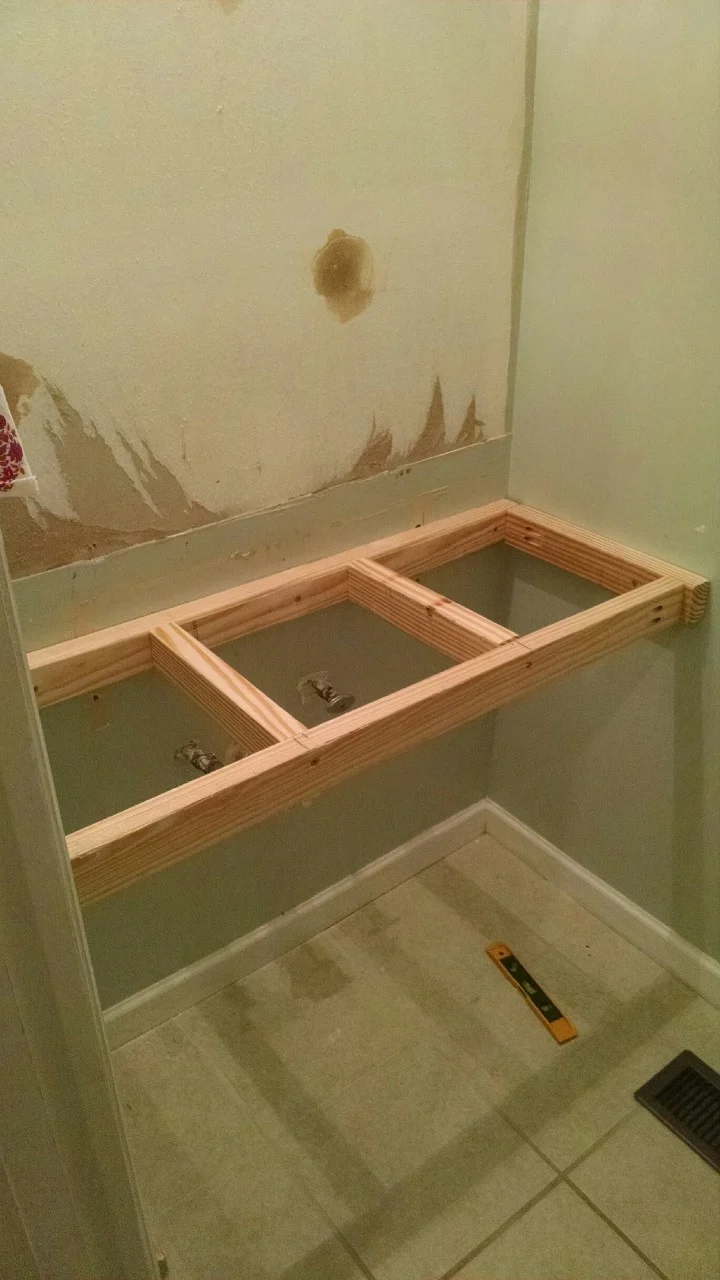
Anchor the face to the 45 top by using 18GA brads making sure 45 degree cut matches top 45 degree so that no edge is visible.
Step 4: Sand and finish
Smooth out any rough surfaces using sandpaper. Use Wood Filler to fill any nail or screw holes. Pay attention to corners and edges to achieve a polished look. Once you are satisfied with the smoothness, decide whether you want to stain or paint the vanity. Apply a couple of coats, allowing each coat to dry before moving onto the next. If desired, seal the vanity with a polyurethane sealant for added protection and durability.
I wanted an aged oak look so I always use the same combination in Minwax:
Pre-stain
Simply White
Early American
Satin Finish Poly
Step 5: Install the sink and plumbing
Consult a professional plumber to handle the installation of the sink and plumbing. Follow their instructions and guidelines to ensure proper functioning and avoid any leaks.
Step 6: Mount the vanity
Once everything is ready, carefully lift and mount the vanity onto the wall. Double-check that it is level and securely attached to the studs. Use screws to secure the vanity in place.
Step 7: Enjoy your new vanity!
Step back and admire your beautiful floating bathroom vanity made out of plywood. Enjoy the clean lines and functionality that brings to your bathroom space. Here's ours. What do you think? I feel like it matches my modern rustic / modern farmhouse aesthetic of the rest of my house really well. I still need to add photos and finishing touches to the shiplap walls, but I love the end result and I wouldn't hesitate to build something like this again!

Remember, building a floating bathroom vanity requires some level of carpentry skills and tools. If you are unsure or uncomfortable with any step, it's best to consult a professional or seek guidance from an experienced DIYer. With patience and determination, your plywood floating vanity will become a standout feature in your bathroom, adding both functionality and aesthetic appeal.


Comments